How To Remove Calcium Deposits From Faucet?
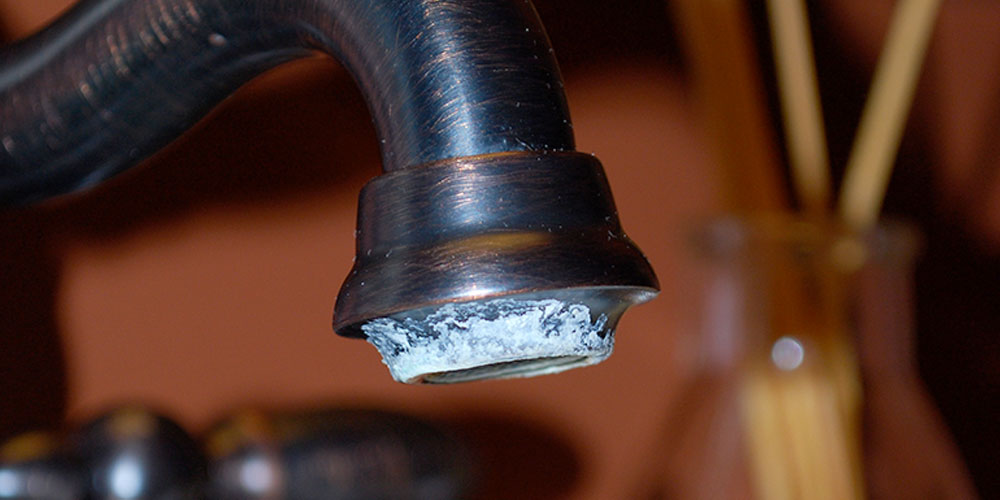
You must have noticed an icy or chalky deposit on your faucets of the sinks. Do you know what is it or why does this happen? The answer is hard to tap water. Dealing with hard water can be a headache as they have a tendency to accumulate on the faucets or plumbing fixtures and clog faucet aerators. This is widely seen in industrial settings with commercial grade faucets where the water supply has more minerals as compared to domestic lines.
This can also alter the look and finishing of your faucet along with having a negative impact on its working. This is why it is always advisable to make a habit of cleaning your faucets and sink regularly. If you are looking for ways to get rid of these unpleasant spots and stains of calcium or mineral deposits, you are in luck. Read the article thoroughly to know the step-by-step guide on how to remove calcium and mineral build-up on faucets.
What Causes Calcium Build-up On A Faucet?
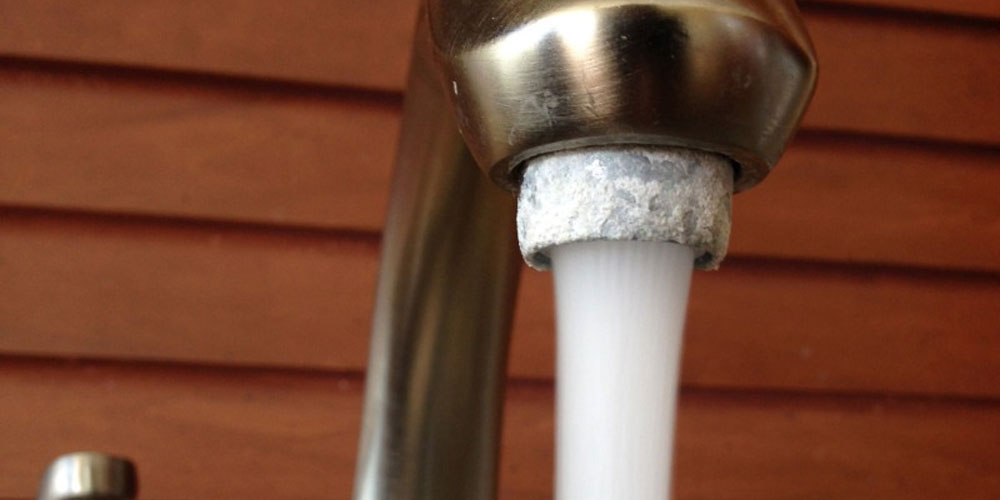
There is a possibility of mineral buildup in and around your faucets if you have hard tap water. These spots are stubborn and do not get cleaned even after working hard enough to clean your sinks. The faucet will still have traces of these spots no matter how hard you try to remove them. The primary reason for calcium build-up on a faucet is hard water. The spots will be more prominent if you have a leaky faucet. You might first want to tighten it. What happens is the hard water, over time, leaves stains and chalky powder on your kitchen as well as bathroom faucet. This subsequently leads to the clogging of your faucet head and reduced water pressure, causing uneven spray. The faucet aerator can also be clogged due to this calcium build-up in the plumbing fixtures which eventually disturbs the flow of water. However, here, you have a choice to follow simple steps and fix it by yourself without calling a plumber.
Removing Calcium And Mineral Deposits From Faucet | Step By Step Guide
You would want to keep the following things handy while removing Calcium and Mineral deposits from the faucets: Toothbrush, Paper towel, Lemon juice, All-purpose cleaner, White distilled vinegar, Rubberband, Plastic bag, Rags. Make sure you have all of the items mentioned above. You are good to go, now let us get into the cleaning part.
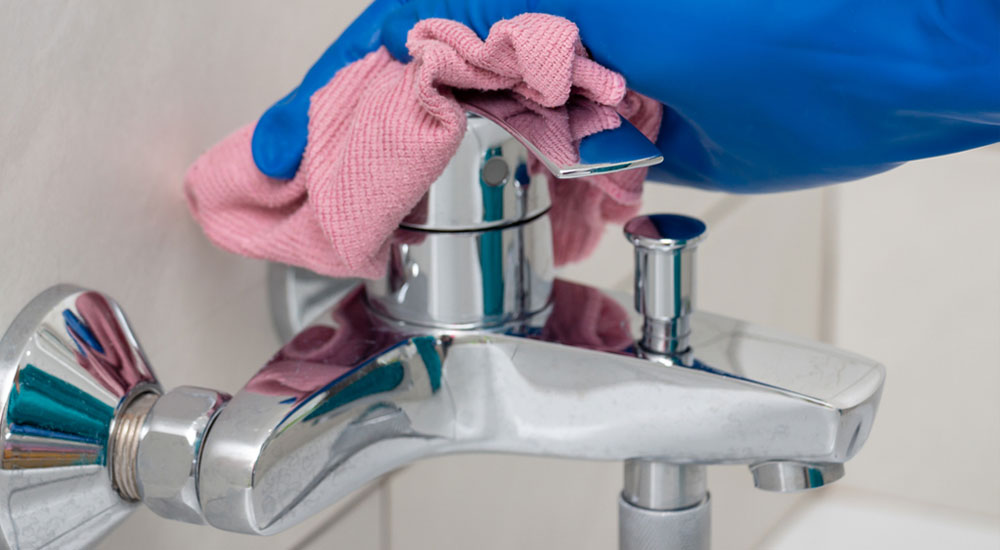
1. Regular Cleaning
- To begin with, clean your faucet entirely either with an all-purpose cleaner or by simple lemon juice. You may also add a mild detergent to prevent any kind of damage to the faucet.
- The next includes mixing of 1-2 tablespoons of dishwashing liquid, 3 cups of warm water, and an all-purpose cleaner altogether inside the small basin to form some suds.
- Soak up the soap mixture thus formed by a washrag and start scrubbing the faucet gently. Maintain a circular motion across the surface of the faucet and slowly move towards the handle, neck, and base of the faucet.
- Use a toothbrush to scrub the grimy areas in a gentle back-and-forth motion only after coating the toothbrush bristles with baking soda. The baking soda paste can be prepared by mixing few drops of water with baking soda.
- You can clean the small cracks by using a 12-inch cut-out piece of floss and putting it in between the spaces or cracks on the surface of your faucet. Maintain an up and down motion.
- After this, rinse the surface of the faucet thoroughly with a wet cloth soaked in cold water. Focus over the surface for removing the grime, gunk, and soap mixture from the floss cleaning. Rinse it until the surface is clean.
- Then, lastly, utilize a microfiber cloth for drying the surface by gently moving the cloth in back-and-forth strokes on the entire surface. Make sure to do this until it is completely dry.
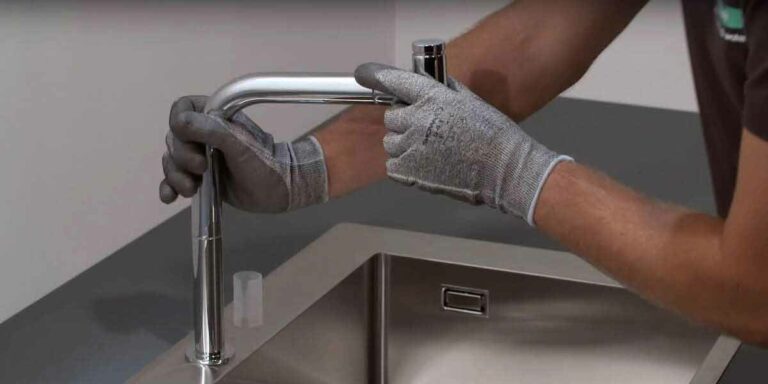
Remember to Wear Gloves
- Putting on your gloves while removing calcium and mineral deposits is a must as they will help protect your skin from chemicals and irritants.
- Make sure the gloves are free from dirt.
- As the cleaning may lead to a lot of splashing, go for gloves that cover all or most parts of your forearm. However, you won’t be requiring gloves if you are working with vinegar.
2. Dilution Of Calcium Cleaner With Water
- Take a container that is bound for the recycling bin and mix one part of calcium remover with a bowl of water in it. 1 to 2 tablespoons of ingredients shall be enough for giving effective results.
- However, you can use vinegar instead of the calcium deposit is not big. It is a time taking process but surely is harmless to faucet finishes and bare skin.
- Remember not to use vinegar or calcium remover for iron or nickel faucets as it can damage the finish of the faucet along with the gunk you are cleaning.
3. Putting The Mixture Into A Plastic Bag And Tying It To The Faucet
- Pour the mixture prepared into a plastic/sandwich bag and be careful not to spill it. You can use a funnel for pouring it without making a mess out of it.
- Attach this bag to this faucet at an angle in which the mixture can build up in one of the corners.
- Then carefully slide the open end to the faucet and submerge the tap in this mixture. Fasten the baggie properly to the faucet with the help of a rubber band and allow it to soak for a few hours.
4. Removing The Build-up
- Take off the baggie by untying the rubber band and dispose it of. Check the label on the cleaners to see the disposal instructions and then dispose of it as indicated.
- Proceed with scrubbing off the calcium or miner build-up with an old toothbrush in a gentle back-and-forth motion.
- Continue this till the build-up is completely eliminated and then use a microfiber cloth to dry the faucet. For drying, maintain a circular motion and continue until fully dried.
5. Removing The Calcium And Mineral Build-up From The Plating Of The Faucet
- Dry the faucet’s surface and base with a clean dry cloth and make sure every drop of water should be completely absorbed.
- You can utilize undiluted white vinegar to remove the calcium and mineral deposits from the plating.
- You just need to take a drape and cover the affected areas with it and leave it for at least an hour. Ensure that the drape is completely in contact with the surface.
- Scrub the faucet with a sponge and you will notice the deposits falling off.
How To Prevent Calcium Build-up On Faucets?
It is important to prevent the build-up of calcium deposits on the faucets to retain their finishing and texture along with helping them to work as expected every time you turn on the water. This applies to all types of kitchen faucets. Few tips to prevent the calcium build-up on your faucets are given below:
1. Installing a water softener system:
It will help treat the water of your entire home via ion exchange, eliminating magnesium and calcium in the water.
2. Keeping a Magic Eraser handy:
It helps in quick and convenient spot-cleaning. Keep in mind to dry the faucet and sink with a clean towel after using it for preventing the standing water to leave water stains.
Final Words
Even though dealing with hard water and calcium/mineral deposits can be a real challenge, it’s possible to completely eliminate the stains and spots with proper instructions. We assume that after going through various options, tips, and tricks of cleaning these calcium and mineral deposits given in this guide, you must have understood how easy and less of a hassle it is. However, installing a water softener might help big time to prevent the calcium and mineral build-up on your faucets.